
Ice cream is a favorite of mine, and this oat milk ice cream is creamy-amazingness. It’s homemade so there’s no need for all of the stabilizers and preservatives in store-bought. Making your own oat milk is so simple, it’s a wonder we don’t all make it all the time!
February seems to be birthday month in my family, which means lots of desserts including ice cream. And I wanted to join in on the celebration with eating ice cream rather than just watching everyone enjoy ice cream that I couldn’t because of all of my food sensitivities. This is how I created this amazing creamy, can’t believe it’s not dairy oat milk ice cream!
This oat milk ice cream is not vegan (it requires eggs), but is gluten free, dairy free, and corn free. I have modified this recipe from one with cow’s milk, so if you can do dairy you can find that recipe here.
If you can’t do dairy (like most of my family), follow along and enjoy this ice cream! Scroll down for the printer friendly version.
*This recipe does require an ice cream maker, blender, and cheesecloth/fine mesh strainer.
Making the Oat Milk:
I make my oat milk instead of buying it. You can skip over this if you have oat milk you like from the shops.
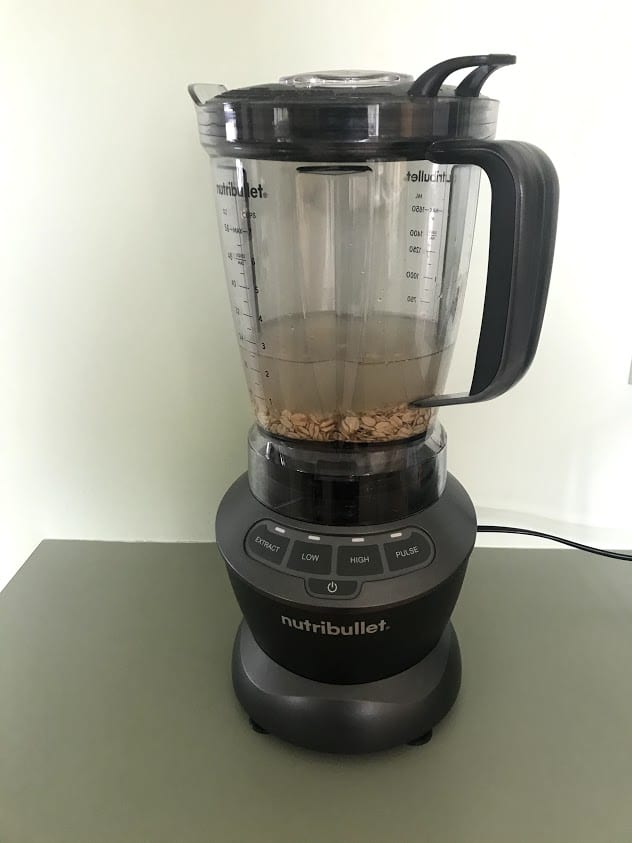
In a blender (I’m using a Nutribullet), combine 2/3 cups rolled oats and 2 1/2 cups water. Blend it for around 15-20 seconds. I usually judge it for when I think the majority of the oats have at least been chopped and the liquid looks murky. Next, strain this liquid. There’s 2 different options for this, depending on what you have:
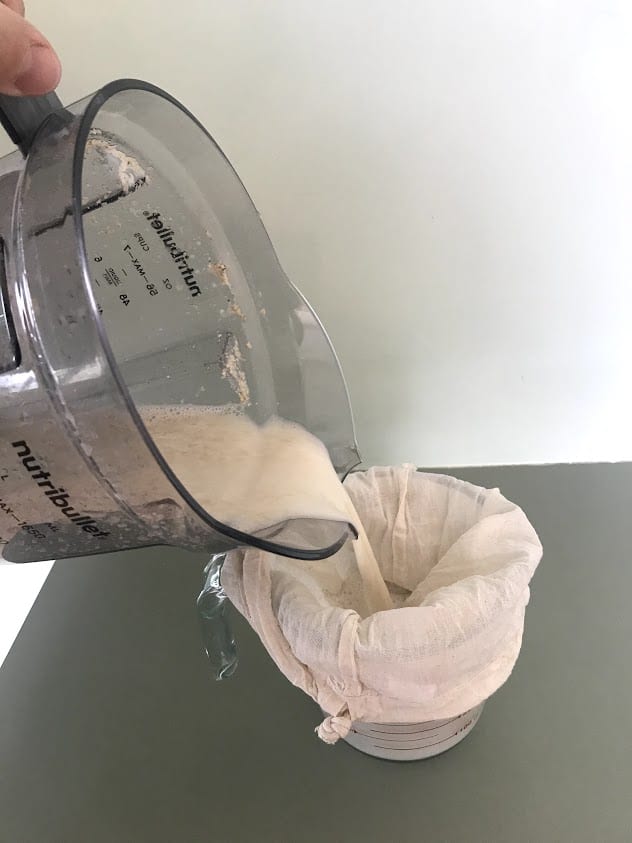
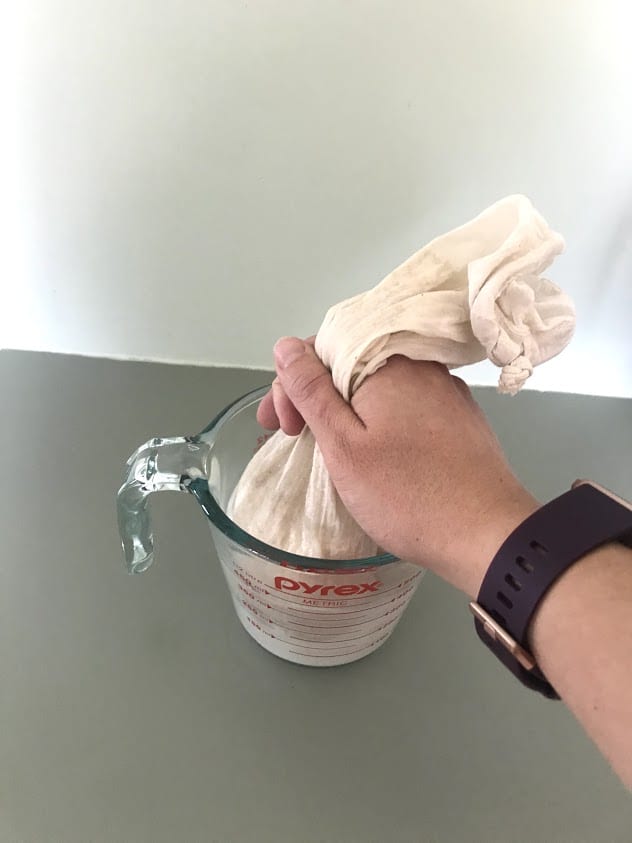
Cheesecloth is probably the easiest. Pour the liquid into cheesecloth and strain it into a bowl, collecting all of the liquid. If you don’t have cheesecloth, you can remove the oat particles by straining it with a small strainer. Occasionally, clear out the bottom of the strainers so liquid will still get through.
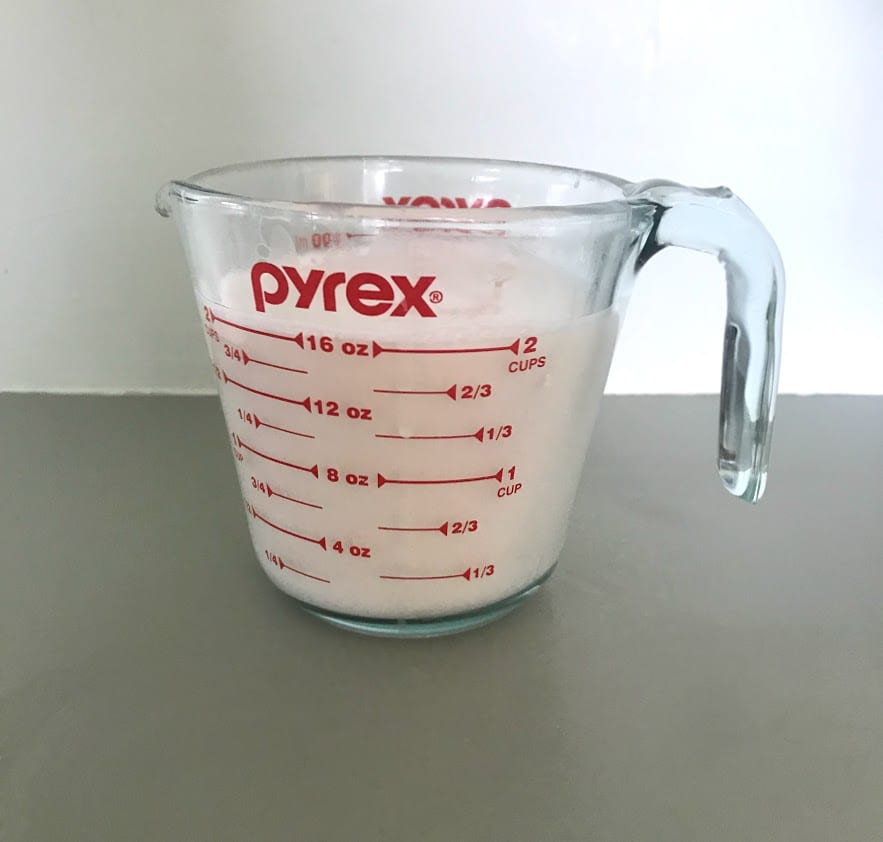
Next, I put this oat milk in a pan over medium-low heat while I prepare the next ingredients, whisking occasionally. It might clump up some, that’s okay, it’s just how oats work (sort of like grits consistency in some places).
Preparing the ingredients:
I like to use my KitchenAid stand mixer whenever possible, so I don’t have to wear myself out whisking. This is optional.
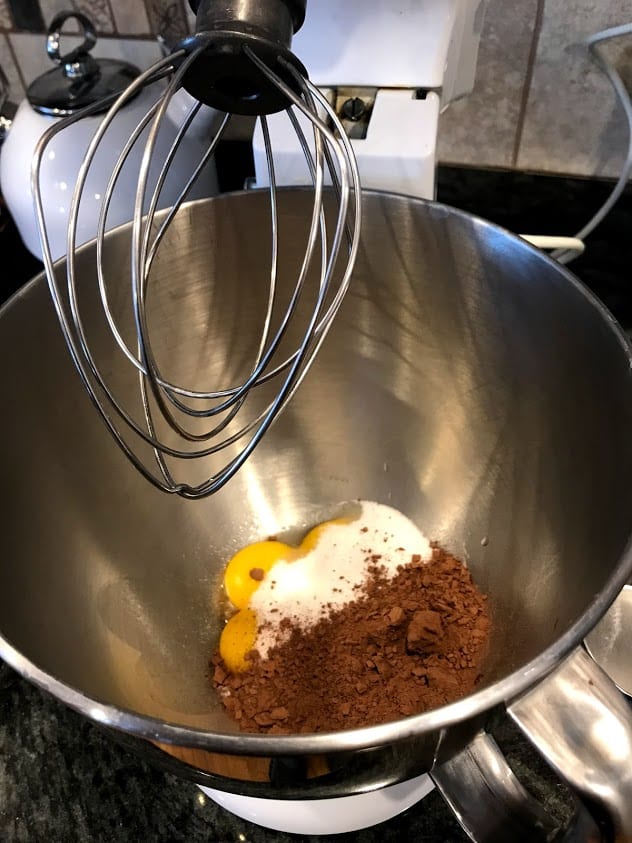
In a mixing bowl or stand mixer bowl, add 4 egg yolks, 1/2 cup sugar (1/4 cup more for chocolate ice cream), 1tbsp oil, and optional cocoa powder (2-3 tbsp). Mix with the whisk attachment or whisk by hand until thoroughly mixed (I usually let my mixer go for about a minute).
Once the milk has heated up (or check with a thermometer, I let mine get to 165F), pour a little into the mixer. Either have the mixer going, or be whisking by hand so the eggs don’t scramble. Continue pouring in while mixing. I usually mix the custard base for a few minutes, to emulsify the combination (making sure the oil is throughout the custard, instead of separating later on).
Cooking the custard:
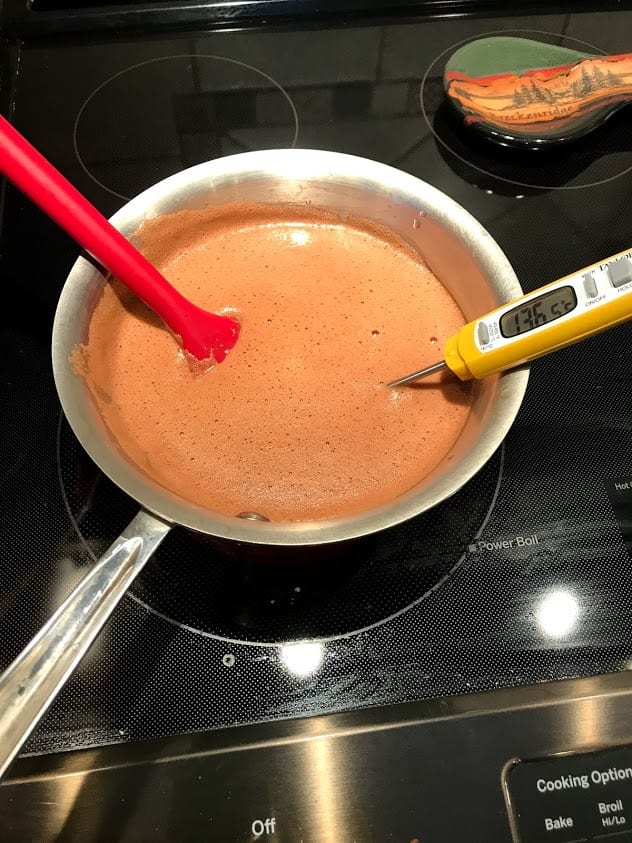
Pour everything back into the pot, and have on medium heat. Continue mixing/whisking while heating, checking the temperature often. Once the mixture reaches 165F, remove from heat so it doesn’t overcook. (165F is when the bacteria will be killed from the egg yolk so there’s no chance of salmonella). This is also how the ice cream gets its custard texture.
Cooling and Freezing
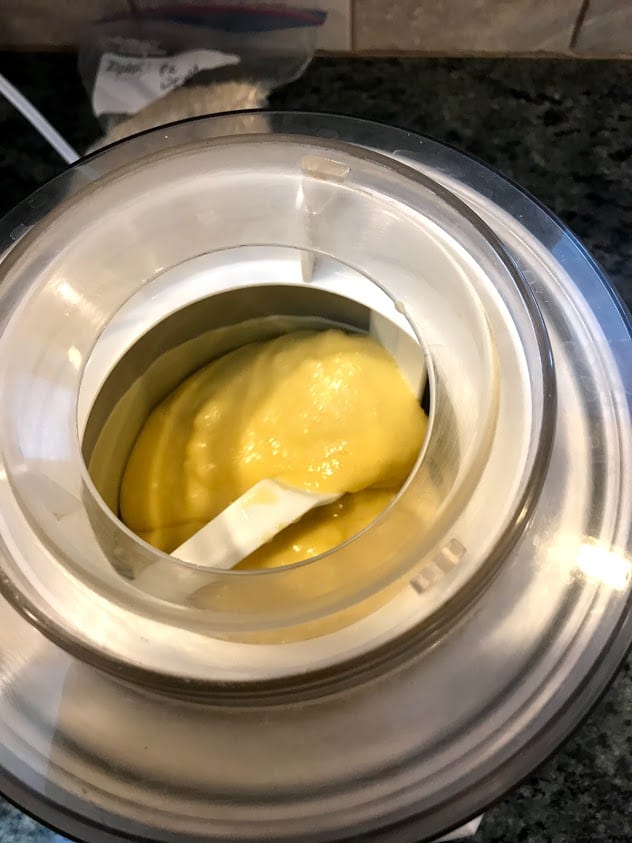
Finally, pour custard base into ice cream maker (I use the a Cuisinart). This is when you add in the vanilla extract or the seeds from the vanilla beans. I let mine go for around 20 minutes, or until it looks like soft serve ice cream. Transfer into a container and leave in the freezer for a few hours to fully freeze.
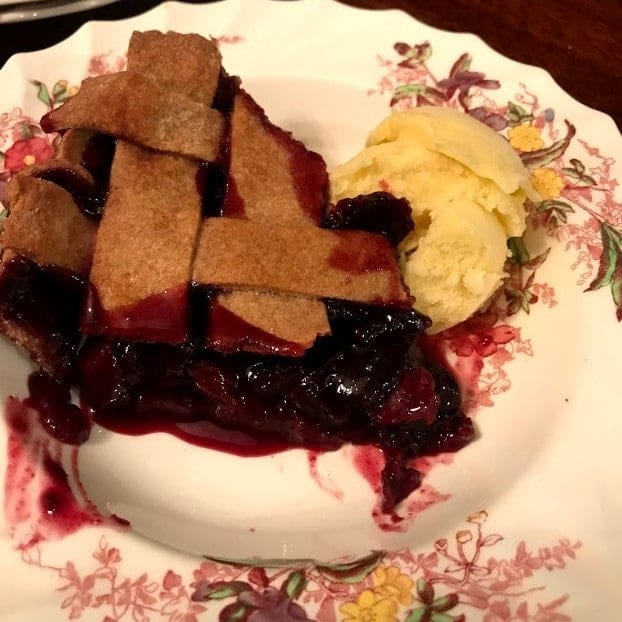
Enjoy! I served it next to pie for my dad’s birthday, but could easily be eaten on it’s own.

Recipe
Oat Milk Ice Cream
Ingredients
- 2/3 cup rolled oats
- 2 1/2 cups water
- 1/2 cup sugar
- 4 egg yolks
- 1 tbsp sunflower oil
- 2 tsp vanilla extract or seeds from vanilla beans
Instructions
- Prepare the oat milk. Combine the oats and water in a blender for about 15-20 seconds. Pour the mixture through cheesecloth or a fine mesh strainer to remove larger oat particles.
- Put in a medium saucepan over medium-low heat until it reaches about 160F or about to simmer, stirring occasionally.
- While the oat milk is heating up, in a bowl or stand mixer, combine the egg yolks, sugar, and oil. Whisk to combine.
- Whisking quickly or having the stand mixer going, pour some of the milk in to temper the eggs. Continue mixing while adding the rest of the milk in. Whisk for a few minutes to fully emulsify the mixture.
- Transfer the custard back into the saucepan over medium high heat, mixing often. Remove from heat when the temperature reaches 165F. Transfer to an airtight container, and put in fridge for about 4 hours or until cool to touch.
- Add in the vanilla extract.
- Pour into ice cream maker and allow it to run for about 20 minutes, or until mostly frozen.
- Finish the freezing process by transferring ice cream into airtight container and leaving in freezer for a few hours.
Nutrition Facts
Oat Milk Ice Cream
Serves: 6
|
Amount Per Serving: 2 scoops
|
||
|---|---|---|
| Calories | 158 | |
| % Daily Value* | ||
| Total Fat 5.9g | 7.7% | |
| Saturated Fat 1.4g | 5% | |
| Trans Fat 0 | ||
| Cholesterol 140mg | 46.7% | |
| Sodium 9mg | 0.4% | |
| Total Carbohydrate 23.4g | 7.7% | |
| Dietary Fiber 0 | 0 | |
| Sugars 17g | ||
| Protein 3g | ||
| Vitamin A | Vitamin C | |
| Calcium 22mg | Iron 1mg | |
* Percent Daily Values are based on a 2,000 calorie diet. Your daily values may be higher or lower depending on your calorie needs.
A Food Mood
Looking for more desserts to make? Or need vanilla extract for this oat milk ice cream? Check out my other recipes! Let me know what you think of this in the comments! Or tag me on Instagram @livingcornintolerant #livingcornintolerant. I hope you like it!